Geraniums are one of the simplest flowers to propagate. Today I took several cuttings from 3 geraniums I am overwintering so I will have enough to plant out this spring. I take off about 2/3 of the mother plant which still has leaves of mass to grow into healthy, beautiful plants. The cuttings are then stripped of all but 2-3 small leaves, dipped into rooting hormone, and placed into damp medium. I find that the roots will be stronger with this method. Another method of propagating geraniums is to place cuttings into a vase of water. No matter which method you choose, you will be blessed with an abundance of beautiful flowers all summer long.
Don't forget that in the fall, you can take cuttings from those you planted out this spring to save over the winter to repeat the process next year.
Tuesday, April 21, 2009
Monday, April 20, 2009
Garden Journal

The weather was incredible on Saturday! It was 75 degrees and sunny. I was able to get outside for most of the day to get some yard work done. Our city gives away wood chips so I decided to make some nice paths to keep me from sinking ankle deep in mud this spring. My tomatoes and peppers got a little sun also today...but not too much as it was their first time outside.


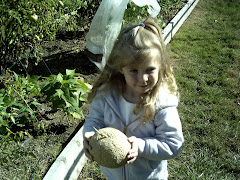
The plants are doing really well in the hoop house as well. I am able to pick some incredible salads daily. All the other varieties of vegetables I planted as seeds are sprouted and look very happy. The box you see in the back contains 4 potato plants. As they get larger, I will continue to fill the box and hope to get a nice size harvest. I will be planting another similar box in another area in about a month to stagger the harvest.
I am in the process of making rain barrels out of 44 gallon trash cans and will post a few pictures soon, unfortunately, it is raining out too much to go take pictures LOL. Hope to see you again soon. Kim
Monday, April 13, 2009
A quick check in
Sorry to have been away for so long. The doctors are frantically working up my husband for his transplant and between doctor's appointments and work, I have little time to do anything else.
I do have about 60 tomatoes and 40 peppers along with a few other vegetables growing under lights in the basement which keeps my thumb a little green. The vegetables in the hoop house are looking great and today I was able to pick a nice salad for lunch. Unfortunately, I think I may have put my potato in a pot outside too early as it looks pretty sad. I took it out of the pot to see how things were looking and found a lot of tiny potatoes trying to grow. I placed it back into the pot but don't expect too much from it at this point...but you never know so I am not giving up yet.
Tonight I am trying my hand at making sourdough bread. I made the starter a few days ago and have some dough rising. Hopefully it works out so I can post a simple recipe for you all.
I'll check in again as soon as I can. Kim
Monday, April 6, 2009
Queso Blanco
Queso blanco is a very simple cheese to make. Queso Blanco is not typically used as a table cheese on crackers such as cheddar and does not melt like mozzarella but definetly has its place in the kitchen. Queso Blanco can be use as a substitute for tofu in recipes and will have no ill effects on people who are allergic to soy products. Queso blanco is a good way to use up extra milk and also freezes well. It takes less than 10 minutes to make and is very high in nutrition.
Supplies to yield approximately 1/4 cup Queso Blanco:
2 cups milk (we drink 2% so that is what I use)
1 to 2 teaspoons white vinegar
non-aluminum sauce pan
thermometer, I use my digital meat thermometer
spoon
small square of muslin or very fine cheese cloth
sieve
extra pan or bowl to catch whey
The process is extremely simple. Since I only wanted a small amount of Queso Blanco to use for dinner in stir fry, I started with 2 cups of milk. You may make a larger amount of Queso Blanco by simply using more milk and vinegar.
Place the milk into a sauce pan. Place the thermometer into the pan and slowly bring the milk to a temperature of 180 to 185 degrees and cook for 5 minutes. Keep the heat low so the milk does not scorch on the bottom of the pan.

You will see a thin layer of scum develop on top of the milk. After 5 minutes using the spoon, skim off the scum and discard. Now pour the vinegar into the warmed milk and stir. You should see curds (lumps) develop immediately. If needed to get a good curd, add a little more vinegar 1/2 teaspoon at a time. The liquid which separates is known as whey.

Place the muslin or fine cheese cloth into the sieve over a container to catch the whey. Now pour the curds and whey into the muslin. Allow to strain until all the whey is removed. The result will be a white, sort of rubbery cheese.

The resulting whey will have a slight green tinge. The whey contains a lot of nutrition as well and can be used in place of water when cooking. Refrigerate both the Queso Blanco and whey until ready to use or you can freeze both.
Queso Blanco is a great way to use up milk that is soon to expire. I usually purchase milk by the gallon because it is the same price as a half gallon, but since my husband and I do not drink a lot of milk, before it was going to waste. Also, milk is extremely inexpensive right now in our area. Just last week I purchased 3 boxes of cereal and received 3 gallons of milk for free. Knowing there is no way we would use up the milk before it expires, I thought it would be the perfect time to start making and freezing Queso Blanco for use later when milk will cost more.
Dinner tonight will be vegetarian stir fry with Queso Blanco over rice made with the whey....yum! I hope you give Queso Blanco a try and if you do let me know how it worked out for you. Kim
Just wanted to add another note (4/8/09) last night for dinner I used some of the Queso Blanco crumbled into spaghetti sauce...it was delicious! I am also thinking of using it as a replacement for ricotta in a 3 cheese (Queso Blanco, parmesean and mozzarella), vegetable lasagna.
Sunday, April 5, 2009
Garden Journal
It looks like the garden is going to expand a little this year. My honey was feeling pretty good (and our son was over visiting) so he made a couple more raised garden beds for me. I have been wanting to expand this year but thought it was out due to his failing health and limited funds. John was able to find "culled" lumber at a really good price and used some to make the beds for me. Now it is my turn to find some good compost to fill them with.
I finally finished transplanting the tomatoes into larger pots...but wouldn't you know it, I forgot to count how many I ended up with. In many of the pots there were double and even triple seedlings and since I am such a tomato nut, I didn't have the heart to simply snip any off so...I gently swished the roots in room temperature water to remove the soil and then gently separated the plants. Now I have even more to get rid of but, I already have a line up of people asking for a tomato plant or two this year.
My next big transplanting project is going to be the peppers. I have at least 30 or so of those started as well. This is the first year I have had this type of success with peppers and believe it is due to placing them on a heated seedling mat.
I am a little worried about the plants in the hoop house but will keep the faith...we are supposed to have 3-5" of snow tonight. I'm crossing my fingers (and toes) hoping everything makes it to harvest time.
Well, I'll update again after the big snow and let you know how my little darlings made it through. See you next time, Kim
Subscribe to:
Posts (Atom)