Monday, October 12, 2009

It has been a long time

I thought it was time to give you all an update into what life has thrown at me. As I mentioned before, my husband passed away in June. Since that time I have pretty much had to do a total renovation on my house. It all started when the roof started to leak. I was at work the day the roofers came to install the new roof. The material was delivered by a very large truck which they backed into the driveway. The driveway cracked so bad that it sloped toward the house and caused the basement to flood. So new roof and new driveway. During the hottest and most humid week of the summer, my air conditioner died. New furnace and air conditioner had to be installed. The hot water tank dropped the bottom off and flooded the basement. New hot water tank was installed. My drier died...well you know what came next. As I was scrubbing the wall in the shower, it fell off! Well since I plan on staying in this house for many more years, I decided to do a complete tear out and replacement of the bathroom. Since the kitchen cabinets were literally fall off the wall, I did the bath and kitchen together. When things finally started to settle down, on Friday I was sitting at a stop light when WHAM! I got rear ended! So today the car goes into the shop.

You know I decided a long time ago that life was too short to let these things get to me and have been working at just getting things fixed. I was getting a little down and decided to find a new hobby and love to keep my sanity and along came 'J'. He is the new love of my life and a very good distraction. We have been going to training and dog shows. He is now officially a UKC Champion and has a leg toward his Grand Champion. We have really met some wonderful people and have been having lots of fun. Some day soon, I hope to add a couple more dogs since he has been so wonderful!


Here we are on the day he Championed! He was incredible. On this weekend there were 4 shows in total. He won his class 4 times. He won best dog 4 times. He won best of winners 3 times. He won Best of Breed and a Group Second! For a 9 month old puppy, he did incredible and was able to champion in one weekend!

This past weekend we did a 5 show. We moved up to the champions class and had some pretty stiff competition. There were 5 dogs total. He took 1 Best of Champions, 3 Reserves, a Best of Breed and a Group 4th. He is doing amazing! When I purchased this dog it really wasn't for the purpose of doing conformation. I intended on getting into rally, obedience, and later agility. This is a very interesting twist and I have decided to continue on with the conformation for the next year to see if he can get his Grand Champion and with one leg already, I think he has a good shot at it.

I'll try to update more in coming months to let you know what life has to offer and I hope you will come back to visit me soon in My Little Corner of the World. Kim

(Champion photo by 4 paws imagery)

Sunday, August 2, 2009

Putting up the beans

I thought I would share with you some of the beans I harvested today. After eating my fill for the day, I have been putting some of the beans into the freezer to enjoy during the winter. It takes just a little work but the reward of eating fresh, organic, homegrown beans is so worth it!

Here are the beans I had left to put into the freezer. I eat a LOT of beans while working out in the garden. I really like them raw and prefer to eat them this way while I can. The next best thing is the fresh, I mean REALLY fresh, frozen beans in the winter. I like to pick them and freeze them within a few hours.

The first thing I do is get a large pot lightlysalted water boiling. While the water is heating up, I also get a nice large pan of ice water ready. You need the ice water bath to stop the boiling process so the beans do not overcook. They will stay much firmer when frozen. This is a very important step!


Clean the beans and place in a colander and then plunge into the rapidly boiling water.


I cook them for only about 30-45 seconds and then IMMEDIATELY plunge into the ice water bath.


The beans will stay this beautifully green and fresh while frozen if you blanch them this way. I have kept beans frozen for over a year and had them look and taste this great.


The Foodsaver has been one of the bestinvestments I have ever made! I have had this one for 6-7 years and use it often. I have kept meat and vegetables for over a year in the freezer and have had no loss in color or flavor. I highlyrecommend them for putting up fruit, vegetables and meat for the freezer.


Today's harvest all ready to pop into the freezer.


Just in case you are curious, I use the Square Foot Method of growing my vegetables. The area I have for beans is 2'x8'. In the last 2 weeks, I have had plenty of beans to eat and share and still managed to put 13 bags into the freezer.

Happy Harvest! Kim

General garden pictures

I took a bunch of random garden pictures today and thought I would share them with you. I have been a little lax in taking care of the garden but will post a series of pictures to show you that I haven't totally given up on it. It may have a few weeds but, I have been getting lots of fresh vegetables out of it. I have so many zucchini I think my neighbors are going to lock the doors and close the curtains next time they see me coming.

What an incredible lunch I had today! I was able to harvest some romaine lettuce, green pepper, 3 kinds of tomatoes, beets, cucumber and some herbs. I added some feta cheese, olives and dressing and had a fantastic salad.

The tomatoes have turned into a jungle! I had a lot of problems with blossom end rot which put my harvest almost a full month behind. I did a lot of pruning of excess foliage today and hope it helps give the plants some better air circulation. I was able to find quite a few tomatoes that were unaffected and hope the BER tapers off so I can enjoy many more and have enough to put up for the winter.

A few of the tomatoes and some peppers I picked (forgot to take pictures before I ate quite a few). As I was pruning, I knocked off some large green tomatoes which should ripen just fine on the kitchen counter.

Some of those zucchini I mentioned. I am getting some this big and at least 3-4 every couple days. Just kidding earlier about the neighbors running. The extras I take to a local greenhouse where there is a drop off for produce to be given to Forgotten Harvest. I have been able to share quite a bit so far this spring starting with lettuce late in May.

One of my favorite vegetables, kohlrabi. Many people have no idea what this vegetable is. I think they are wonderful and am so happy to have been eating these since early spring. I winter sowed a lot of these and am so glad I did. I plan on doing them again for next year as well.

I'm not sure if you remember my experiment with planting potatoes in pots. These are just some of the ones I was able to harvest...I didn't think to take pictures before I ate a few. I am going to try growing them indoors this winter for sure! All in all, quite successful.

The last of the broccoli and the most successful. I started several plants indoors under lights early this spring and planted them outside in March. This one plant was winter sown and by far put out the largest head. My daughter was very lucky to receive the other plants I started this way and was just as successful. Another plant I will definitely start this way again next year.

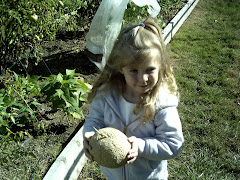
Alright, not a garden picture but I thought you might like to see what I actually look like. My granddaughter has become quite good at taking pictures and this is one she snapped of me.

I also have been harvesting LOTS of beans and in the next post will show you what I have been doing with those I am not sharing and eating. Hope you enjoyed my update! Kim

Life goes on...

I thought I should take some time to let everyone know that I am still around. Things have been pretty busy since John died. With the small amount of life insurance he had, I have been fixing up the house so I won't have to worry about major things such as a roof for many years to come. I have to start thinking like a single woman now and looking at what my future holds.

I have been trying to enjoy many of the things I used to, although, the nights can get pretty lonely. Many nights I have a hard time sleeping with thoughts of "what if". You know, what if the surgery had gone different, what if he waited a few more weeks...well, I'm sure you can understand.

I'll try to do better in getting updates done. Kim

Saturday, June 13, 2009

With a heavy heart...

The doctors removed the polyp that was holding up John's transplant surgery but unfortunately they were unable to control the massive amount of bleeding he had following the surgery. The doctors and nurses worked for many hours to try to stop the bleeding and maintain a blood pressure. When it was obvious there was nothing more that could be done I and our children decided to let him pass with dignity. One of John's last wishes was not to die on a ventilator and we had it removed. He passed quietly and actually looked amazingly peaceful at 9:34 am on Thursday, June 11, 2009.

Thank you all for the prayers you gave over the past few months. John and our family were truly blessed 7 years ago when he received his first liver transplant. We were able to enjoy 7 more years with him that he would not have other wise had. Please consider organ donation if unfortunately the time comes. It is a precious gift that John appreciated and honored to the fullest.

I will miss him more than I could ever put into words. I think our granddaughter Jordan said it best, "Grandpa is going to be an angel now".

Friday, June 5, 2009

Garden pictures

I thought it was a good day to get a few pictures of the gardens. My yard is so small that I cannot fit the entire garden into one picture. I will just show the pictures so you can get a good idea of how they look. Hope you enjoy! Kim


The picture on the left is of the cucumbers and the one on the right is of the melons. I started all of these indoors about 2 weeks before planting them outside.


Here are my absolute favorite vegetables...tomatoes! The picture on the left shows the 2 tomato beds and the picture on the right is a close up of one of the beds.


A picture of the lush growth of plants that were originally under the hoop house. The lettuce is still growing strong and the broccoli is over a foot tall now. In the back is a row of peas. I am hoping the peas provide just the right amount of shade so I can extend the lettuce harvest well into summer.


This is 2 shots of my one really long bed. It is 4'x24' and I cannot fit a picture in one shot. Against the fence is lots of pots full of different types of food plants such as potatoes, herbs, sunflowers and lots more.


The gardens as seen from my patio. Here I am standing against the house and I cannot fit the yard in one picture...that's how small it is.


Raspberries and blueberries on the left and the strawberry tower on the right. Next year we should have lots of berries to eat!!!


Last but not least, the bed behind the garage. There is a grape on each end which will be trained on wires. The middle is for a new planting of asparagus. Toward the far end is a rhubarb.

Monday, May 25, 2009

Chinese Bok Choi Salad

One of the best things I did in the garden this year was to install the hoop house. We have been able to enjoy garden fresh vegetables for over a month now when others in our area are just now planting. All the cool weather crops are coming in very well. On Sunday I was able to pick such a large salad, I was able to feed 14 people for lunch. There was a wonderful variety of lettuces, spinach, corn salad, oriental salad greens, beet tops, radishes and herbs such as chives, oregano, parsley and basil. All I added was some chopped boiled eggs and shredded cheese to make it a meal. The lettuces and greens are doing so well in fact, that my daughter was still able to make another large salad to take to a picnic for 8 people today. Ah don't worry there is plenty left to eat all week long!

For dinner tonight I wanted to use some of the Bok Choi, or is it Pak Choi...I really don't know the difference. I made up this simple but tasty salad as a side dish for grilled burgers.

Chinese Bok Choi Salad

1 large or 3 small Bok Choi or Pak Choi

Wash the Bok Choi and remove large stems but do not discard. Chop the stems and place in a large bowl. Stack the leaves and cut in half down the middle from the top to the stem end. Now cut the leaves into strips, similar in appearance to shredded cabbage and place with the stems into the bowl and set aside.

2 tablespoons margarine
2 tablespoons blanched slivered almonds
2 tablespoons sesame seeds
1 package Ramen Noodles, crushed while still in package (Oriental or chicken flavor)


Remove the seasoning packet from the Ramen Noodles and set aside. Melt margarine in saucepan and saute the almonds, sesame seeds and Ramen noodles until golden. While this is cooking make the sauce. When golden brown, add to the Bok Choi in the bowl.

**This step is not totally necessary but adds a little more flavor. You may choose to just place the ingredients into the bowl with the Bak Choi.**

2 tablespoons vinegar (rice wine, red wine or plain white works)
2 tablespoons olive oil
2 tablespoons sugar (or sugar sub works well also)
1 teaspoon soy sauce
1/2 packet seasoning mix from Ramen noodles

Place above ingredients into a jar with a tight fitting lid and shake well. Pour over all the ingredients in the bowl and toss well. Refrigerate at least 1 hour.

I hope you enjoy this simple spring salad at your next picnic or backyard Bar-B-Que! Kim

Saturday, May 16, 2009

Maple Banana Bread

I had a couple bananas looking a little brown and decided it was time to make some banana bread. I modified a very old recipe I had that used honey as the sweetener to use up my maple cream that had crystallized (note to self: use it up sooner!). It tastes great and the natural sweetness of the maple shines.

1/2 cup melted butter
1/2 cup maple syrup (or in my case crystallized maple cream)
1 egg, lightly beaten
2 ripe bananas, mashed
1/2 teaspoon vanilla extract
3 tablespoons milk
2 cups flour
1 teaspoon baking soda
1/2 teaspoon baking powder
1/4 cup chopped walnuts (optional)

Preheat the oven to 350 degrees. Grease a 5x9 loaf pan well and set aside.

In a large bowel, mix the melted butter and syrup. Stir in the beaten egg and mashed bananas, milk and vanilla extract.

In another bowel, sift together the flour, baking soda and baking powder. Stir the flour mixture just until moistened in the the banana mixture (over mixing will make the banana bread tough).

Pour into greased baking pan and place into the preheated oven. Bake 40-50 minutes or until a knife placed in the center comes out clean.

Enjoy!

Garden Art


Last year my granddaughter Jordan and I grew a couple birdhouse gourds. Today grandpa drilled a hole in one so Jordan could paint it. Of course, she painted it pink! She wanted a flower for the bird to go into, so I outlined it for her and she painted it in. A final coat of a clear sealer will help keep it safe.

I think the birds will love it.

Wednesday, May 13, 2009

Today's Harvest


The garden is giving us ever more food each day. Today we were able to pick enough greens for a very large salad for dinner tonight. It is so amazing to be able to simply go out to the backyard and find something wonderful.

Dinner yesterday was a great stir fry using all my Asian vegetables...too bad I didn't think to take pictures for you all to see. Kim

Tuesday, May 12, 2009

Mother's Day


Things have been very busy in the garden the past few days. The kids came over as a gift to help move a 6 yard dump truck full of compost to some new raised beds. I added 2 beds of 3'x8'. One bed is for raspberries and the other is for lignon berries and blueberries. A 4'x8' tiered strawberry bed was added along with 2 beds of 4'x8' for trellised plants and tomatoes.


Everyone helped including my 4 year old granddaughter and garden girl, Jordan. It is amazing how much enthusiasm she has for gardening! She helped move the entire pile of compost to the new beds. As a matter of fact if we tried to take a break, she would tell us we are not tired yet LOL. Here she is with both her daddy and grandpa.


Once the garden beds were filled, she just had to start planting. You must know that she is "a big girl" and "I can do it all by myself". Here she is planting the beans that will grow between the tomato plants. I heard tomatoes love the nitrogen that the beans help fix and will grow stronger and larger.

Things are beginning to grow and green up well and hopefully the weather will stay warm enough to have things planted over the next couple weeks. I'll update again soon so please come back to My Little Corner of the World. Kim

Thursday, May 7, 2009

Time for an update

Sorry to have been gone for so long but as you may have read my husband is very ill. Between work and taking him to numerous doctor's appointments, I have very little time left. What time I do have, I have been putting in new raised beds and starting the summer crops. The plants in the hoop house are growing like crazy and I am able to get large dinner salads daily from it. I also planted lots of Asian vegetables which are now able to be harvested for stir fry twice a week.

Today I tilled under the large raised bed, moved some some soil from another bed into one of the new ones and borrowed a trailer to pick up some compost this weekend to fill the new beds. I am already tired but now have to get ready to work this evening. I'll post pictures soon so you can all see the progress...thanks for stopping by, Kim.

Tuesday, April 21, 2009

Geraniums

Geraniums are one of the simplest flowers to propagate. Today I took several cuttings from 3 geraniums I am overwintering so I will have enough to plant out this spring. I take off about 2/3 of the mother plant which still has leaves of mass to grow into healthy, beautiful plants. The cuttings are then stripped of all but 2-3 small leaves, dipped into rooting hormone, and placed into damp medium. I find that the roots will be stronger with this method. Another method of propagating geraniums is to place cuttings into a vase of water. No matter which method you choose, you will be blessed with an abundance of beautiful flowers all summer long.

Don't forget that in the fall, you can take cuttings from those you planted out this spring to save over the winter to repeat the process next year.

Monday, April 20, 2009

Garden Journal


The weather was incredible on Saturday! It was 75 degrees and sunny. I was able to get outside for most of the day to get some yard work done. Our city gives away wood chips so I decided to make some nice paths to keep me from sinking ankle deep in mud this spring. My tomatoes and peppers got a little sun also today...but not too much as it was their first time outside.


The plants are doing really well in the hoop house as well. I am able to pick some incredible salads daily. All the other varieties of vegetables I planted as seeds are sprouted and look very happy. The box you see in the back contains 4 potato plants. As they get larger, I will continue to fill the box and hope to get a nice size harvest. I will be planting another similar box in another area in about a month to stagger the harvest.

I am in the process of making rain barrels out of 44 gallon trash cans and will post a few pictures soon, unfortunately, it is raining out too much to go take pictures LOL. Hope to see you again soon. Kim

Monday, April 13, 2009

A quick check in

Sorry to have been away for so long. The doctors are frantically working up my husband for his transplant and between doctor's appointments and work, I have little time to do anything else.

I do have about 60 tomatoes and 40 peppers along with a few other vegetables growing under lights in the basement which keeps my thumb a little green. The vegetables in the hoop house are looking great and today I was able to pick a nice salad for lunch. Unfortunately, I think I may have put my potato in a pot outside too early as it looks pretty sad. I took it out of the pot to see how things were looking and found a lot of tiny potatoes trying to grow. I placed it back into the pot but don't expect too much from it at this point...but you never know so I am not giving up yet.

Tonight I am trying my hand at making sourdough bread. I made the starter a few days ago and have some dough rising. Hopefully it works out so I can post a simple recipe for you all.

I'll check in again as soon as I can. Kim

Monday, April 6, 2009

Queso Blanco

Queso blanco is a very simple cheese to make. Queso Blanco is not typically used as a table cheese on crackers such as cheddar and does not melt like mozzarella but definetly has its place in the kitchen. Queso Blanco can be use as a substitute for tofu in recipes and will have no ill effects on people who are allergic to soy products. Queso blanco is a good way to use up extra milk and also freezes well. It takes less than 10 minutes to make and is very high in nutrition.

Supplies to yield approximately 1/4 cup Queso Blanco:

2 cups milk (we drink 2% so that is what I use)
1 to 2 teaspoons white vinegar
non-aluminum sauce pan
thermometer, I use my digital meat thermometer
spoon
small square of muslin or very fine cheese cloth
sieve
extra pan or bowl to catch whey

The process is extremely simple. Since I only wanted a small amount of Queso Blanco to use for dinner in stir fry, I started with 2 cups of milk. You may make a larger amount of Queso Blanco by simply using more milk and vinegar.

Place the milk into a sauce pan. Place the thermometer into the pan and slowly bring the milk to a temperature of 180 to 185 degrees and cook for 5 minutes. Keep the heat low so the milk does not scorch on the bottom of the pan.


You will see a thin layer of scum develop on top of the milk. After 5 minutes using the spoon, skim off the scum and discard. Now pour the vinegar into the warmed milk and stir. You should see curds (lumps) develop immediately. If needed to get a good curd, add a little more vinegar 1/2 teaspoon at a time. The liquid which separates is known as whey.


Place the muslin or fine cheese cloth into the sieve over a container to catch the whey. Now pour the curds and whey into the muslin. Allow to strain until all the whey is removed. The result will be a white, sort of rubbery cheese.


The resulting whey will have a slight green tinge. The whey contains a lot of nutrition as well and can be used in place of water when cooking. Refrigerate both the Queso Blanco and whey until ready to use or you can freeze both.

Queso Blanco is a great way to use up milk that is soon to expire. I usually purchase milk by the gallon because it is the same price as a half gallon, but since my husband and I do not drink a lot of milk, before it was going to waste. Also, milk is extremely inexpensive right now in our area. Just last week I purchased 3 boxes of cereal and received 3 gallons of milk for free. Knowing there is no way we would use up the milk before it expires, I thought it would be the perfect time to start making and freezing Queso Blanco for use later when milk will cost more.

Dinner tonight will be vegetarian stir fry with Queso Blanco over rice made with the whey....yum! I hope you give Queso Blanco a try and if you do let me know how it worked out for you. Kim

Just wanted to add another note (4/8/09) last night for dinner I used some of the Queso Blanco crumbled into spaghetti sauce...it was delicious! I am also thinking of using it as a replacement for ricotta in a 3 cheese (Queso Blanco, parmesean and mozzarella), vegetable lasagna.

Sunday, April 5, 2009

Garden Journal

It looks like the garden is going to expand a little this year. My honey was feeling pretty good (and our son was over visiting) so he made a couple more raised garden beds for me. I have been wanting to expand this year but thought it was out due to his failing health and limited funds. John was able to find "culled" lumber at a really good price and used some to make the beds for me. Now it is my turn to find some good compost to fill them with.

I finally finished transplanting the tomatoes into larger pots...but wouldn't you know it, I forgot to count how many I ended up with. In many of the pots there were double and even triple seedlings and since I am such a tomato nut, I didn't have the heart to simply snip any off so...I gently swished the roots in room temperature water to remove the soil and then gently separated the plants. Now I have even more to get rid of but, I already have a line up of people asking for a tomato plant or two this year.

My next big transplanting project is going to be the peppers. I have at least 30 or so of those started as well. This is the first year I have had this type of success with peppers and believe it is due to placing them on a heated seedling mat.

I am a little worried about the plants in the hoop house but will keep the faith...we are supposed to have 3-5" of snow tonight. I'm crossing my fingers (and toes) hoping everything makes it to harvest time.

Well, I'll update again after the big snow and let you know how my little darlings made it through. See you next time, Kim

Tuesday, March 31, 2009

Garden Journal

The weather was a sunny 50 degrees today and was perfect for planting some seeds into the hoop house. The plants are looking good and showing signs of new growth. Seeds were planted close together in 2 ft rows and consisted of shallots, chiogga beets, golden beets, clindra beets, danvers half long carrots, purple dragon carrots, rainbow blend carrots, turnips, french breakfast radish, watermelon radish and sugar snap peas. I'll report as soon as I see the first signs of emerging plants.

The plants under lights are looking very healthy and some needed transplanting. A dozen tomatoes went into larger pots and 3 types of basil were started (purple opal, lemon and genovesse). My plan was to begin many more herbs but my husband decided to paint one wall of the basement and since I am extremely allergic to latex, I had to stop for a few hours until the paint dries. Well this give me enough time to figure out what to make for dinner and to write a quick blog entry.

Dinner tonight needs to be very soft since I had a tooth pulled yesterday. I thought a nice omelet sounded good. I found some chives, walking onions and oregano growing well in one of my permanent beds and cut some for the omelets. A nice treat later will be some biscuits with maple cream...that should be soft enough for me to chew. Now that I know what to make, I'd better get started. See you next time. Kim

Monday, March 30, 2009

Garden Journal

I was caught totally off guard yesterday by a rather large snowstorm. Thanks to my hoop house, all the plants outside are alive and looking very healthy. Hopefully in the next couple days, I will be able to plant out some early spring crop seeds as well. I will be planting out beets, carrots, peas, radishes, radicchio, spinach, turnips and rutabaga. I'm not sure the temperature of the soil will be warm enough to germinate but since I am trying to push spring a little bit, it will be worth the try.

The seedlings of tomatoes and peppers under lights in the basement are looking happy and growing well. Now that they are about 2", it is time to add a fan gently blowing on them to stimulate stronger stems so they can withstand the winds outside when they are a little older.

Spring is ever so slowly warming up which means much more planting to come so please come back and join me in My Little Corner of the World. Kim

Friday, March 27, 2009

Maple Cream


Since I have never seen nor tasted maple cream, I am hoping this is the real thing. Making the maple cream was very simple and not as time consuming as I thought it would be...well at least in comparison to making the syrup. The taste is so incredible!

Supplies:

thermometer capable of reading at least 240 degrees
very DEEP cooking pot (I used the one from the turkey fryer)
4 cups (2 pints) maple syrup
ice water bath
strong wooden spoon or Kitchen Aid mixer

Place 4 cups water into the cooking pot. Bring to a boil and test the temperature. In my case, water was at a full boil at 210 degrees. Carefully pour out water and dry pot.

Pour the maple syrup into the pot. You may add a teaspoon of butter if you like to keep the syrup from boiling up too high. WATCHING AT ALL TIMES!!! Bring syrup to a boil. It will foam up considerably and you DO NOT want it to boil over! It will make a mess that will NEVER come off your stove.

Continue to watch the syrup boil, but do not stir, until it reaches 24 degrees above the point your water boiled. It took me about 13 minutes to get my syrup to 234 degrees (remember your temperature may vary).

Once syrup has reached 24 degrees above the boiling point of water. Carefully place the cooking pot into a sink of ice water. DO NOT DISTURB! Allow to cool, undisturbed, until it reaches 80 degrees. This took about 35 minutes.

Once cooled to 80 degrees, begin to stir. You will need a lot of muscle at this point and may even have to ask the husband, kids and neighbors to help. I poured my cooled mixture into the bowel of my Kitchen Aid mixer and turned on the lowest setting. I mixed for approximately 20 minutes until it reached the consistency of peanut butter.

Pour into 1/2 pint jars, screw on the lid and refrigerate.

Enjoy! This is absolutely heavenly on fresh, homemade biscuits.

Garden journal

The lettuce I planted in the hoop house last week still looks healthy so I decided to give spring a little push again today and put out some more plants. I still have lots of seeds so if things don't do well, I can start again. Today I planted, 9 kohlrabi, 6 Japanese pak choi, 10 bok choi, 3 Michili cabbage, 2 pak choi, 2 swiss chard, 1 kale, 6 broccoli, 6 cauliflower, 4 purple glazer garlic, 1 yukon gold potato, 1 red potomac potato and the rest of my salad greens I was growing in the basement this winter. The salad greens that went outside are: red sails lettuce, grand rapids lettuce, spinach, mache', freckles lettuce and black seeded simpson lettuce.

We are supposed to get one night this week below freezing so I will keep my fingers crossed that all my little babies will do well. I am running out of space under my growing lights with all the tomato, pepper and other vegetables! Hopefully, we have a bountiful harvest this year.

Medical news

For those of you who visit my blog, first thank you...it makes it worth writing. Just in case I seem to disappear for a little while, I wanted you all to know I will return. My husband is in very poor health and needs a liver transplant in the very near future. He is going through a lot of testing and as soon as they are done, he will be listed. Since his health is failing rather quickly, he will be near the top of the transplant list. Hopefully, he will be visited by an angel and receive a new liver soon. Please keep him in your prayers...love and hugs, Kim

Wednesday, March 25, 2009

New toy


My husband found this nice little battery powered chainsaw on the clearance rack at Lowe's for me. It is easy to handle and works great for trimming small trees. I usually don't use any type of power tools except the lawnmower, but I think this one is going to be quite handy. It made easy work of trimming the small landscape tree in front of the house.

Looks like I have a new toy! Next stop, trimming the fruit trees at my daughter's and mom's house.